PHP之深入学习Yii2缓存Cache组件详细讲解
什么是缓存组件Cache
缓存是提升 Web 应用性能简便有效的方式。 通过将相对静态的数据存储到缓存并在收到请求时取回缓存, 应用程序便节省了每次重新生成这些数据所需的时间。

定义缓存组件
Yii2的缓存是通过组件Component实现的,在项目的配置文件中,配置components->cache实现对缓存组件的定义。
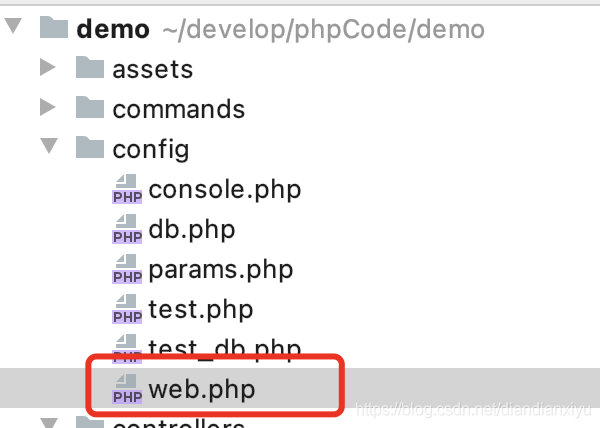
项目配置文件的路径为config/web.php。

页面缓存PageCache
作为网站来讲,Yii2的页面缓存非常便捷地将已经渲染完全的网页结果保存起来,并在一个缓存周期内不需要再次处理页面内部的控制器动作逻辑。
配置页面缓存
页面缓存的配置方式为,在控制器层Controller中配置行为behaviors,通过调用过滤器filters的方式,在进入具体页面路径action的之前,对当前key进行计算,并判断缓存是否启用enabled缓存有效期duration。
基础配置代码如下所示
        return [
            'pageCache' => [
                'class' => 'yiifiltersPageCache',
                'only' => ['index'],
                'variations' => [
                    '/',
                    Yii::$app->request->isAjax,
                ],
                'enabled'=>true,
                'duration' => Yii::$app->params['pageCacheDuration'],
            ],
        ];
过滤器是Yii2中的一个概念,他可以在控制器初始化的时候加载并执行,我们可以用这个特点去做一些对控制器的数据的限制,比如控制缓存、用户权限控制。
这里我们将行为名称定义为pageCache,显然名字不重要,因为有的案例中,因为不同的页面缓存规则不一样,我会定义两个页面缓存的行为。
其中only为过滤器调用action的参数,用于限制哪些路径是启用action的。
页面缓存PageCache是缓存组件Cache的一种应用
页面缓存的根本逻辑为
- 配置缓存组件的实现比如文件缓存yiicachingFileCache
- 页面缓存封装一层Cache组件,再去调用存取逻辑
我们可以通过查看页面缓存源码vendor/yiisoft/yii2/filters/PageCache.php,我们可以在文件的第162行发现,这里调用的cache,就是对于缓存的实现。
$this->cache = Instance::ensure($this->cache, 'yiicachingCacheInterface');
自定义页面缓存过滤器
为什么我们需要自定义缓存组件呢,我归纳原因存在以下几种
- 缓存判断逻辑过于简单或复杂,不如自己重写痛快地多
- 缓存key生成方式不满足业务需求
那么如何自定义呢?我个人推荐最简单粗暴的方式,继承。
use yiifiltersPageCache;

class PageCacheCtInfo extends PageCache
{
	这里是内部逻辑,不需要重写的方法可以不写。
	public $checkUser = true; //可以自定义变量
}
调用方式也是跟默认的页面缓存一样,只要换上对应的类即可。
            'pageCacheInfo' => [
                'class' => 'commoncomponentsPageCacheCtInfo',
                'only' => ['info'],
                'enabled'=>Yii::$app->params['pageCacheEnabled'],
                'variations' => [
                    'ct/'.Yii::$app->request->pathInfo,
                    Yii::$app->request->isAjax
                ],
                'duration' => Yii::$app->params['pageCacheInfo'],
                'checkUser' = false,
            ],
页面缓存key的计算
根据上一个步骤,我们可以重写计算key的方式,那么之前的key计算方式是什么样的呢?
文件位置vendor/yiisoft/yii2/filters/PageCache.php。
    /**
     * @return array the key used to cache response properties.
     * @since 2.0.3
     */
    protected function calculateCacheKey()
    {
        $key = [__CLASS__];
        if ($this->varyByRoute) {
            $key[] = Yii::$app->requestedRoute;
        }
        return array_merge($key, (array)$this->variations);
    }
这里的缓存key是一个数组,数组内的元素依次是
- 当前类名
- varyByRoute 一般为true
- variations 验证,这个也是配置中获取的,根据上面的配置,则是页面路径和是否为ajax
如果是项目的首页,缓存的key则为
['yiifiltersPageCache','','/‘,0]
如果是个详情页面,key为
['yiifiltersPageCach', 'xxx/info','xxx/xxx/3xxxx74.html',0 ]
那么,这个key到底有什么用,为什么要单独拿出来说呢?
因为我们需要单独删除某个页面缓存。
主动清理过期缓存
根据源码vendor/yiisoft/yii2/caching/FileCache.php
    /**
     * Stores a value identified by a key in cache.
     * This is the implementation of the method declared in the parent class.
     *
     * @param string $key the key identifying the value to be cached
     * @param string $value the value to be cached. Other types (If you have disabled [[serializer]]) unable to get is
     * correct in [[getValue()]].
     * @param int $duration the number of seconds in which the cached value will expire. 0 means never expire.
     * @return bool true if the value is successfully stored into cache, false otherwise
     */
    protected function setValue($key, $value, $duration)
    {
        $this->gc();
        $cacheFile = $this->getCacheFile($key);
        if ($this->directoryLevel > 0) {
            @FileHelper::createDirectory(dirname($cacheFile), $this->dirMode, true);
        }
        // If ownership differs the touch call will fail, so we try to
        // rebuild the file from scratch by deleting it first
        // https://github.com/yiisoft/yii2/pull/16120
        if (is_file($cacheFile) && function_exists('posix_geteuid') && fileowner($cacheFile) !== posix_geteuid()) {
            @unlink($cacheFile);
        }
        if (@file_put_contents($cacheFile, $value, LOCK_EX) !== false) {
            if ($this->fileMode !== null) {
                @chmod($cacheFile, $this->fileMode);
            }
            if ($duration <= 0) {
                $duration = 31536000; // 1 year
            }

            return @touch($cacheFile, $duration + time());
        }

        $error = error_get_last();
        Yii::warning("Unable to write cache file '{$cacheFile}': {$error['message']}", __METHOD__);
        return false;
    }
在设置缓存之前会主动调用清理缓存的方法gc()
    /**
     * Removes expired cache files.
     * @param bool $force whether to enforce the garbage collection regardless of [[gcProbability]].
     * Defaults to false, meaning the actual deletion happens with the probability as specified by [[gcProbability]].
     * @param bool $expiredOnly whether to removed expired cache files only.
     * If false, all cache files under [[cachePath]] will be removed.
     */
    public function gc($force = false, $expiredOnly = true)
    {
        if ($force || mt_rand(0, 1000000) < $this->gcProbability) {
            $this->gcRecursive($this->cachePath, $expiredOnly);
        }
    }
这里问题就出现了,$gcProbability的默认值是10,也就是说,只有0.001%的概率会在设置缓存的同时清理过期缓存。
这不就跟没有一样!
所以对于缓存来说,需要我们主动定期清理过期缓存,不然对应的存储空间就会被占满。
Yii::$app->cache->gc(true);
优化缓存配置
组件的cache在项目的配置文件中定义
'components' => ['cache' => [
    'class' => 'yiicachingFileCache',
],],
这里的自由度就出现了,现在这个配置,是文件缓存,也就是不管是数据缓存还是页面缓存,都是保存在文件里的
根据源码 public $cachePath = '@runtime/cache';
缓存的文件是放在runtime/cache文件夹的
那么问题就出现了,磁盘的性能是有瓶颈的,文件读写会影响缓存性能。
目前可选的缓存有
- yiicachingApcCache,APC扩展
- yiicachingDbCache,数据库缓存
- yiicachingDummyCache,假的缓存,就是现在没条件上缓存先把坑占上
- yiicachingFileCache,文件缓存
- yiicachingMemCache,使用 PHP memcache 和 memcached 扩展
- yiiredisCache,redis
- yiicachingWinCache,使用 PHP WinCache 扩展
- yiicachingXCache,使用 PHP XCache扩展
- yiicachingZendDataCache,使用Zend Data Cache
总结
我在本文中,通过渐进的方式,讲了如何使用Yii2的缓存组件,对于一般的使用者来讲,已经涵盖了超过九成的坑。
如果你正在学习PHP,希望你收藏这篇文章,这会对你以后有所帮助。

到此这篇关于PHP之深入学习Yii2缓存Cache组件详细讲解的文章就介绍到这了,更多相关PHP之深入学习Yii2缓存Cache组件内容请搜索脚本之家以前的文章或继续浏览下面的相关文章希望大家以后多多支持脚本之家!
版权声明:
本站所有文章和图片均来自用户分享和网络收集,文章和图片版权归原作者及原出处所有,仅供学习与参考,请勿用于商业用途,如果损害了您的权利,请联系网站客服处理。


